Demystifying Dental Fillings: What Happens When You Get a Tooth Filled
July 3, 2026
What the Tooth Filling Process Actually Involves (And Why It’s Less Scary Than You Think)
The tooth filling process is one of the most common dental procedures in the world — and one of the most misunderstood.
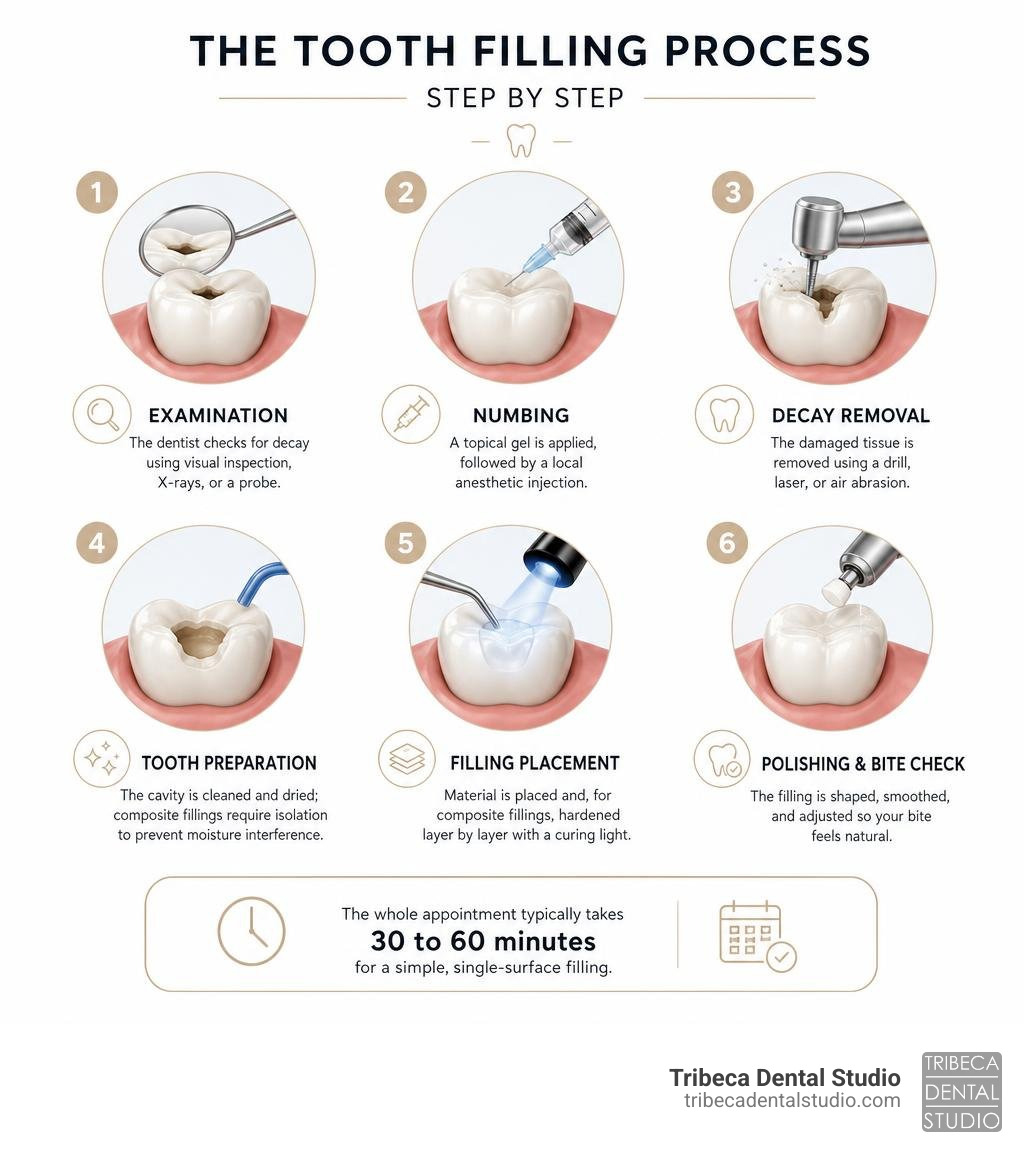
Here’s a quick overview of what happens, step by step:
- Examination — The dentist checks for decay using visual inspection, X-rays, or a caries detecting probe
- Numbing — A topical gel is applied, followed by a local anesthetic injection
- Decay removal — The damaged tissue is removed using a drill, laser, or air abrasion
- Tooth preparation — The cavity is cleaned and dried; composite fillings require isolation to prevent moisture interference
- Filling placement — Material is placed and, for composite fillings, hardened layer by layer with a curing light
- Polishing and bite check — The filling is shaped, smoothed, and adjusted so your bite feels natural
The whole appointment typically takes 30 to 60 minutes for a simple, single-surface filling.
Roughly 90% of adults in the U.S. will have at least one cavity in their lifetime. Yet dental anxiety keeps many people from getting fillings early — which only leads to bigger problems down the road. A small cavity treated today is far less involved than a root canal or crown needed later.
I’m Dr. Nina Izhaky, a graduate of New York University College of Dentistry and founder of Tribeca Dental Studio, where I’ve guided countless patients through a comfortable, personalized tooth filling process using only the safest, most modern materials available. In the sections below, I’ll walk you through everything you need to know — from material options to aftercare — so you can feel fully prepared.
Tooth filling process vocab to learn:
What is a Dental Filling and Why is it Needed?
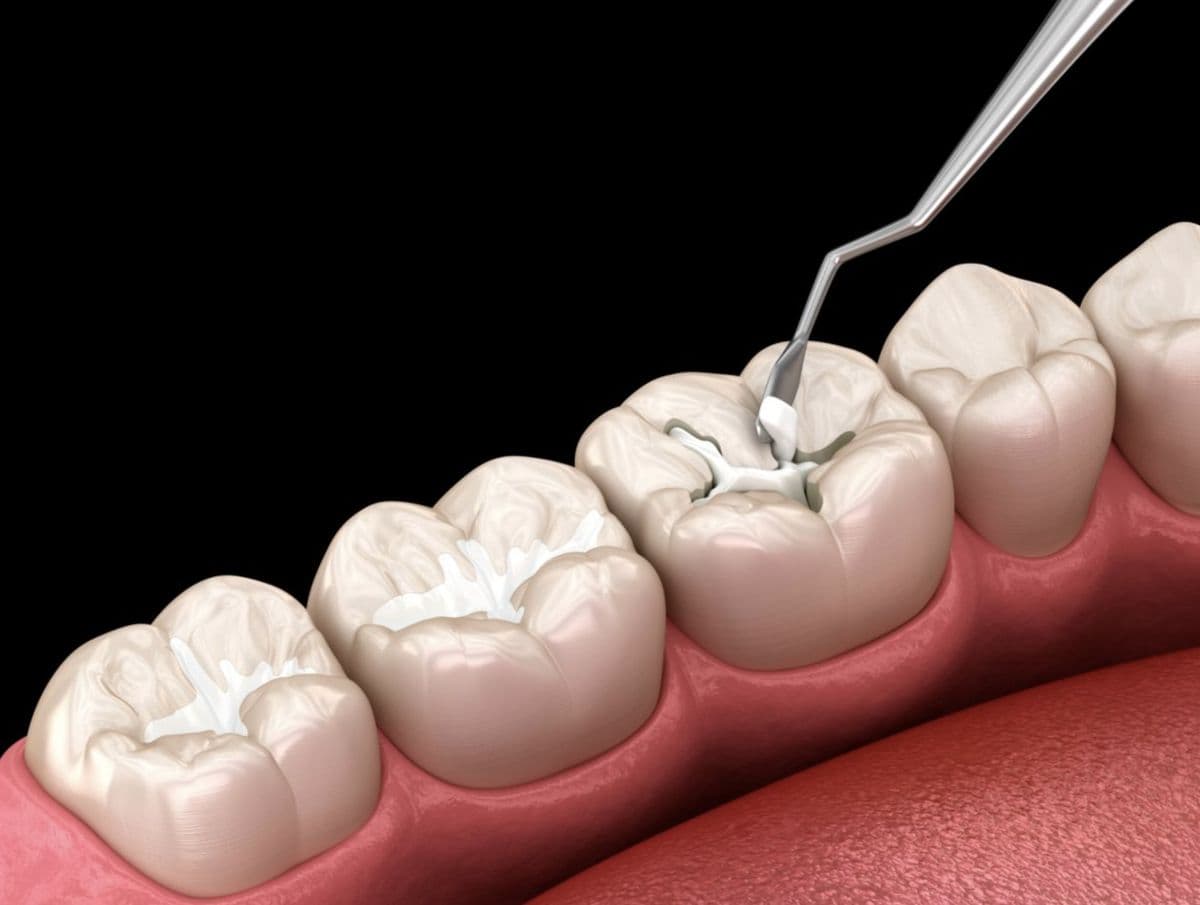
At its core, a dental filling is a restorative treatment designed to repair a tooth damaged by decay or minor structural fractures. When bacteria in your mouth feed on sugars, they produce acids that slowly erode your tooth’s protective outer layer, the enamel. This enamel loss eventually creates a tiny hole, or cavity.
Without intervention, the decay will continue to eat through the deeper layers of the tooth, eventually reaching the sensitive inner nerves. By opting for a dental filling, we remove the diseased tissue, sterilize the area, and seal the space to prevent further bacterial invasion.
Beyond halting decay, a dental filling is essential for:
- Restoring structural integrity: Rebuilding the tooth’s shape so you can chew and bite properly.
- Alleviating tooth sensitivity: Sealing off exposed dentin (the layer beneath enamel) to resolve discomfort caused by hot, cold, or sugary foods.
- Cavity prevention: Restricting pathways where food particles and plaque can accumulate.
To learn more about the fundamental medical purposes of this restoration, you can read the Cleveland Clinic’s detailed guide on Dental Fillings: Types, Materials & What They’re For.
Signs You Might Need a Filling
How do you know if a cavity is developing? While some early-stage cavities can only be detected during a routine check-up, your body often sends subtle (and sometimes not-so-subtle) signals that a tooth needs attention. Look out for:
- Persistent toothache: An ongoing, dull ache or sharp pain when biting down.
- Temperature sensitivity: Lingering discomfort after drinking hot coffee or iced water.
- Discomfort with sweets: A sudden, sharp twinge when eating sugary snacks.
- Visible holes or dark spots: Dark staining or a physically noticeable pit on the surface of your tooth.
- Roughness: Feeling a jagged edge or a catch in your tooth when using your tongue or dental floss.
If you are experiencing any of these symptoms in the Manhattan area, scheduling an assessment is the best way to catch decay before it spreads.
Comparing Different Types of Dental Filling Materials
Dentistry has come a long way since the days when metal fillings were the only option. Today, patients have access to a variety of materials, each with unique advantages depending on your aesthetic preferences and restoration needs. You can read More info about common cavity filling materials to see how they stack up.
Here is a breakdown of the most common materials used in modern restorative dentistry:
- Composite Resin: Made of a plastic mixture filled with microscopic glass particles, composite resin is designed to match the natural shade of your teeth. Because it chemically bonds directly to the tooth structure, it requires less enamel removal during preparation.
- Dental Amalgam: A traditional mixture of silver, tin, copper, and mercury. While highly durable and cost-effective, amalgam is silver-colored and does not bond directly to the tooth, often requiring more tooth structure to be removed to anchor it in place.
- Glass Ionomer: Formulated from acrylic and a specific type of glass material, these fillings are unique because they release fluoride over time, helping to protect the tooth from future decay. They are typically used for fillings near the gumline or in children’s teeth.
- Gold Fillings (Inlays/Onlays): Extremely durable and gentle on opposing teeth, gold restorations are fabricated in a lab and can last upwards of 20 years. However, they are highly visible and carry a premium price tag.
- Porcelain Inlays/Onlays: Often created using advanced CAD/CAM technology, porcelain restorations offer the ultimate combination of natural beauty and durability for larger cavities.
To help you visualize how these materials compare, we have put together this comparison table:
| Material | Typical Durability | Aesthetic Appeal | Relative Cost | Best Suited For |
|---|---|---|---|---|
| Composite Resin | 5 to 10 years | Excellent (Tooth-colored) | Moderate | Front teeth and visible smile zones |
| Dental Amalgam | 10 to 15+ years | Low (Silver/Metallic) | Economical | Back molars with high chewing forces |
| Glass Ionomer | 5 years or less | Good (Translucent) | Moderate | Gumline cavities and pediatric fillings |
| Gold | 15 to 20+ years | Distinctive (Gold) | High | Back teeth requiring maximum strength |
| Porcelain | 10 to 15+ years | Outstanding (Mimics enamel) | High | Large cavities and visible restorations |
Choosing the Best Material for Your Smile
Selecting the right material is a collaborative decision between you and your dentist. When we evaluate your mouth at Tribeca Dental Studio, we weigh several critical factors:
- Aesthetic Preferences: If the cavity is located in your “smile zone” (front teeth), a tooth-colored material like composite resin or porcelain is almost always preferred. For more details on these natural-looking options, read about Tooth-Colored Fillings.
- Tooth Location and Chewing Forces: Back molars bear the brunt of your chewing power. Materials like porcelain, gold, or high-durability composites are often chosen here to withstand heavy pressure.
- Cavity Size: Small to medium cavities are perfectly suited for direct composite fillings. Extremely large cavities may require indirect restorations like porcelain inlays or crowns to prevent the tooth from fracturing.
- Cost and Insurance Coverage: Dental insurance plans often cover composite and amalgam fillings at different rates.
For a deeper dive into making this decision, read More info about choosing the best material.
The Step-by-Step Tooth Filling Process
Understanding the physical steps of the tooth filling process can demystify the experience and greatly reduce dental anxiety. Let’s walk through exactly what happens when you sit in our dental chair.

Before we touch a single tool, we ensure you are fully informed and comfortable. For an overview of the initial prep work, read More info about the cavity filling process.
Preparing the Tooth During the Tooth Filling Process
The preparation phase is all about ensuring a painless procedure and creating a clean, sterile foundation for your new filling.
- Numbing the Area: First, we apply a flavored numbing gel (topical anesthetic) to the gum tissue. This gently numbs the surface so you won’t feel the pinch of the local anesthetic injection. We then administer the local anesthetic to completely block pain signals from the tooth’s nerves.
- Isolating the Tooth: To keep the area completely dry, we often place a dental dam (a thin sheet of protective rubber or vinyl) around the tooth. Keeping moisture from saliva away is critical, especially for composite fillings, as water can interfere with the bonding adhesives.
- Removing the Decay: Once the tooth is completely numb, we use a dental hand-piece or laser to carefully remove the damaged and decayed portions of the tooth. You will feel some vibration and pressure, but you should not feel any pain.
- Verifying Cleanliness: To ensure absolutely no active bacteria are left behind, we may apply a specialized pink or blue caries indicator dye. This dye stains any remaining decayed structures that cannot be remineralized, allowing us to preserve as much healthy natural enamel and dentin as possible.
Placing and Curing the Material in the Tooth Filling Process
Once the cavity is clean, sterilized, and dried, it is time to rebuild the tooth.
- Etching and Bonding: For composite fillings, we apply a mild acidic gel to create microscopic pores in the enamel. This is rinsed away, and a liquid bonding adhesive is brushed into the cavity.
- Composite Layering: We apply the composite resin in thin, precise layers. This incremental approach allows us to carefully sculpt the material to match the natural contours of your tooth. For more details on how this material behaves, read More info about composite filling material.
- Using the Curing Light: Between each layer of composite, we shine a specialized blue curing light onto the tooth. This light triggers a chemical reaction that hardens the resin in just 20 to 40 seconds.
- Bite Adjustment and Polishing: Once the cavity is filled, we have you bite down on a thin strip of carbon articulating paper. This shows us if the filling is sitting too high. We carefully sculpt and smooth down any high spots so your bite feels perfectly natural. Finally, we polish the filling to a high shine so it feels smooth to your tongue and resists future plaque accumulation.
What to Expect During and Immediately After Your Appointment
The typical appointment for a single-surface filling takes about 30 to 60 minutes. If you have multiple cavities or a more complex, multi-surface restoration, your visit may take slightly longer.

At Tribeca Dental Studio, patient comfort is our absolute priority. To read more about how we make your visit stress-free, explore More info about a painless dental filling.
Immediately after your appointment, your mouth will remain numb for approximately 1 to 3 hours as the local anesthetic wears off. During this window, it is incredibly important to:
- Avoid chewing foods to prevent accidentally biting your tongue, lip, or cheek.
- Be cautious when drinking hot liquids to avoid burning your numb mouth.
- Stick to cool, soft drinks or water until you regain full sensation.
Managing Post-Procedure Sensitivity and Aftercare
It is entirely normal to experience some mild, temporary sensitivity to temperature and pressure for a few days to two weeks after getting a filling, especially if the cavity was deep and close to the tooth’s nerve.
To ensure a smooth, comfortable recovery, we recommend these aftercare practices:
- Stick to a soft food diet: For the first 24 to 48 hours, enjoy foods like yogurt, pasta, scrambled eggs, and smoothies. Avoid excessively hard, crunchy, or sticky foods.
- Take over-the-counter pain relief: If you experience mild gum soreness or tooth sensitivity, over-the-counter anti-inflammatories like ibuprofen can help.
- Maintain excellent oral hygiene: Continue brushing twice a day with fluoride toothpaste and flossing daily. Be gentle around the newly filled tooth, but do not skip cleaning it.
- Avoid tobacco products: Smoking can delay healing and increase sensitivity in the surrounding gum tissue.
For a comprehensive checklist on post-treatment care, check out More info about aftercare and recovery.
Longevity, Potential Complications, and Alternatives
While modern dental fillings are highly durable, they do not last forever. On average, you can expect a composite filling to last between 5 and 10 years, while dental amalgam can last 10 to 15 years or longer with meticulous care.
Over time, daily chewing forces can cause a filling to wear down, crack, or pull away from the tooth structure. This creates a microscopic gap where bacteria can slip underneath, leading to “recurrent decay.”
We monitor your existing fillings during your routine check-ups. To understand when it might be time to update an older restoration, read More info about when to replace fillings.
When a Filling Isn’t Enough: Alternatives
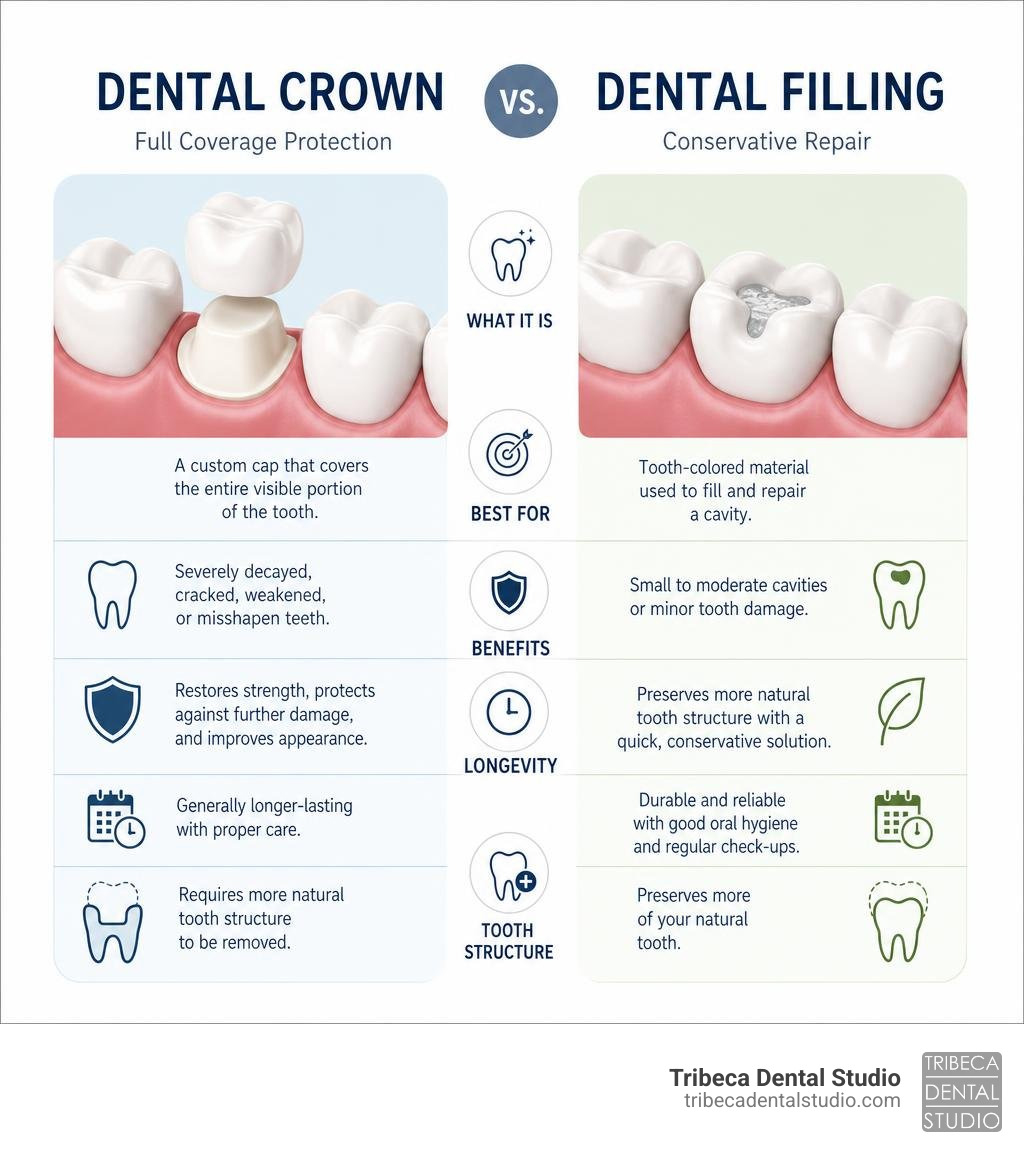
Sometimes, decay has progressed too far for a simple filling to safely restore the tooth. If more than 50% of the natural tooth structure is compromised, a filling may not support chewing forces and could cause the tooth to fracture.
In these cases, we look to alternative restorative treatments:
- Dental Crowns: Often referred to as “caps,” crowns cover the entire visible portion of the tooth, protecting and strengthening it.
- Inlays and Onlays: These are custom-made porcelain or gold restorations fabricated in a lab for cavities that are too large for a filling but do not require a full crown.
- Root Canal Therapy: If the decay has penetrated the inner pulp of the tooth, causing an infection, a root canal is required to remove the diseased nerve before sealing the tooth.
Frequently Asked Questions about Dental Fillings
How long does a dental filling procedure typically take?
For a straightforward, single-surface cavity, the physical tooth filling process takes about 30 to 60 minutes. If you require a multi-surface filling or are having multiple teeth treated in a single session, you should plan to spend about an hour to an hour and a half in the dental chair.
Is getting a dental filling painful?
No, getting a dental filling should not be painful. Thanks to modern local anesthetics, the tooth and surrounding tissue are completely numbed before any work begins. You will feel some pressure and the vibration of the dental tools, but the procedure itself is virtually pain-free. If you ever feel discomfort, you can simply raise your hand and we will immediately pause to adjust your anesthetic.
When is it too late to get a filling?
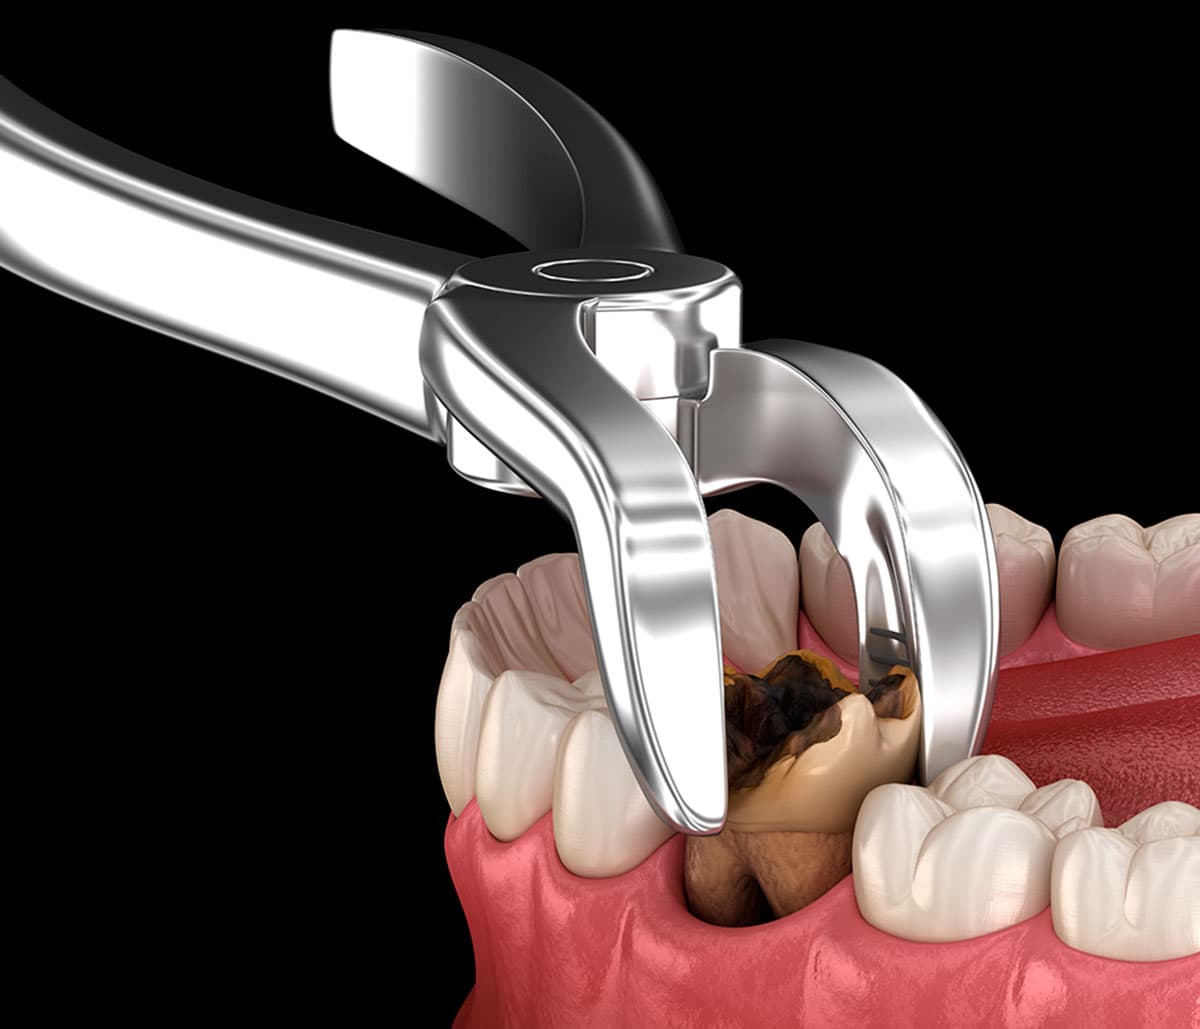
It is too late to get a filling when the decay has breached the enamel and dentin layers and invaded the tooth’s inner pulp chamber. Once bacteria infect the pulp, it can cause a severe toothache, swelling, or an abscess. At this stage, the tooth can no longer be saved with a simple filling; instead, you will need root canal therapy or, in severe cases, a tooth extraction. This is why early intervention is so critical!
Conclusion
At Tribeca Dental Studio, we believe that maintaining a healthy, radiant smile shouldn’t be stressful. Led by Dr. Nina Izhaky, our welcoming Manhattan team takes a personalized, family-centered approach to every treatment. Whether you are experiencing minor tooth sensitivity or are simply due for your routine check-up, we are here to provide comfortable, state-of-the-art care in the heart of NYC.
Don’t let a tiny cavity turn into a major dental headache. Schedule your dental fillings in NYC at Tribeca Dental Studio today, and let us help you keep your smile healthy, strong, and beautiful!